No edit summary |
|||
| (14 intermediate revisions by 2 users not shown) | |||
| Line 1: | Line 1: | ||
| + | {{BossEvent |
||
| − | <tabber>JP=[[File:Banner 0295 m.png|center|680px]]</tabber> |
||
| ⚫ | |||
| − | |||
| + | |name_na= |
||
| ⚫ | |||
| ⚫ | |||
| − | ! colspan="4" |Table of contents |
||
| + | |rerun_jp= |
||
| ⚫ | |||
| + | |release_na= |
||
| − | | style="width:25%" |[[{{PAGENAME}}#Event Guide (JP)|Event Guide]] |
||
| + | |rerun_na= |
||
| − | | style="width:25%" |[[{{PAGENAME}}#Quests|Quests]] |
||
| + | |event_banner_id=295 |
||
| − | | style="width:25%" |[[{{PAGENAME}}#Missions|Missions]] |
||
| + | |event_banner_id_na= |
||
| − | | style="width:25%" |[[{{PAGENAME}}#Event Shop|Event Shop]] |
||
| + | |announce_id=10751 |
||
| ⚫ | |||
| + | |announce_id_na= |
||
| − | |||
| + | }} |
||
| − | == Event Duration == |
||
| − | |||
| ⚫ | |||
| ⚫ | |||
| − | |||
| − | NA |
||
| − | *Not yet released |
||
| − | |||
| − | == Event Guide == |
||
| − | ===Announcement=== |
||
| − | <tabber>JP=[[File:Announce_event_10751.png|680px]]</tabber> |
||
| − | |||
| − | ===How to Play=== |
||
| − | 1. In [[:Category:Boss Event|Boss Events]], stories are arranged on a map-like stage. Players travel from one node to the other to reach the final boss. |
||
| − | |||
| − | 2. Each story node has a target meter and up to 3 battles to choose from (beginner, intermediate, and hard). To clear the node, complete the story battles until the meter fills up. You do not have to complete every battle to unlock the next node; you only need to fill up the node meter. |
||
| − | |||
| − | 3. Boss quests are unlocked at the end of each story area. Boss node meters represent the boss's HP and must be brought to 0 to clear the node. Boss HP does not refill between battles, so bosses can be defeated over more than 1 battle. Defeating bosses gives special currencies and unlocks other areas. |
||
| − | |||
| − | 4. All battles have a turn limit. Exceeding the limit ends the battle as a victory for the player. |
||
| Line 37: | Line 18: | ||
!How to obtain |
!How to obtain |
||
|- |
|- |
||
| − | | [[File:Rumor of Miss Ripper.png|40px]] |
+ | | [[File:The Rumor of Miss Ripper.png|40px]] |
| − | |{{Translation|キリサキさんの噂話|Rumor of Miss Ripper}} |
+ | |{{Translation|キリサキさんの噂話|The Rumor of Miss Ripper}} |
|All event battles drop '''Rumors of Miss Ripper''' which can be exchanged at the shop. |
|All event battles drop '''Rumors of Miss Ripper''' which can be exchanged at the shop. |
||
|- |
|- |
||
| Line 45: | Line 26: | ||
|Clearing a node by filling its meter grants '''Suzune Magica Area Flags''' which can be used to acquire [[Over Limiter]]s and [[Items#Spirit Enhancement Items|Spirit Enhancement Items]]. |
|Clearing a node by filling its meter grants '''Suzune Magica Area Flags''' which can be used to acquire [[Over Limiter]]s and [[Items#Spirit Enhancement Items|Spirit Enhancement Items]]. |
||
|- |
|- |
||
| − | | [[File: |
+ | | [[File:The Item Miss Ripper Searching For.png|40px]] |
| − | |{{Translation|キリサキさんの探し物| |
+ | |{{Translation|キリサキさんの探し物|The Item Miss Ripper Searching For}} |
| − | |Defeating bosses gives players ''' |
+ | |Defeating bosses gives players '''The Item Miss Ripper Searching For''', required for the special Memoria [[Once Again, Taking Your Hand]]. |
|} |
|} |
||
| Line 57: | Line 38: | ||
!Max Limit Break Bonus Effect |
!Max Limit Break Bonus Effect |
||
|- |
|- |
||
| − | | |
+ | |{{MemoPic|Inherited Amulet|100}} |
| − | |Increase |
+ | |Increase {{ItemPic|The Rumor of Miss Ripper|40}} drops by 3 |
| − | |Increase |
+ | |Increase {{ItemPic|The Rumor of Miss Ripper|40}} drops by 7 |
|- |
|- |
||
| − | | |
+ | |{{MemoPic|The Girls' Daily Scenery|100}} |
| − | |Increase |
+ | |Increase {{ItemPic|The Rumor of Miss Ripper|40}} drops by 3 |
| − | |Increase |
+ | |Increase {{ItemPic|The Rumor of Miss Ripper|40}} drops by 7 |
|- |
|- |
||
| − | | |
+ | |{{MemoPic|The Day We Became Friends|100}} |
| − | |Increase |
+ | |Increase {{ItemPic|The Rumor of Miss Ripper|40}} drops by 2 |
| − | |Increase |
+ | |Increase {{ItemPic|The Rumor of Miss Ripper|40}} drops by 5 |
|- |
|- |
||
| − | | |
+ | |{{MemoPic|Once Again, Taking Your Hand|100}} |
|colspan="2" | Attack Up [3000%] & Defense Up [3000%] during the final boss battle |
|colspan="2" | Attack Up [3000%] & Defense Up [3000%] during the final boss battle |
||
|} |
|} |
||
== Quests == |
== Quests == |
||
| − | ''TBC'' |
||
| − | |||
<tabview> |
<tabview> |
||
| + | Rumors in Disguise/Chapter 1 Quests|Chapter 1 |
||
| + | Rumors in Disguise/Chapter 2 Quests|Chapter 2 |
||
| + | Rumors in Disguise/Chapter 3 Quests|Chapter 3 |
||
| + | Rumors in Disguise/Chapter 4 Quests|Chapter 4 |
||
| + | Rumors in Disguise/Chapter 5 Quests|Chapter 5 |
||
| + | Rumors in Disguise/Chapter 6 Quests|Chapter 6 |
||
| + | Rumors in Disguise/Chapter 7 Quests|Chapter 7 |
||
| + | Rumors in Disguise/Chapter 8 Quests|Chapter 8 |
||
| + | Rumors in Disguise/Chapter 9 Quests|Chapter 9 |
||
| + | Rumors in Disguise/Final BOSS|Final BOSS (Chapter 10) |
||
| + | Rumors in Disguise/Chapter 11 Quests|Chapter 11 |
||
| + | Rumors in Disguise/Challenge Quests|Challenge |
||
</tabview> |
</tabview> |
||
| Line 83: | Line 74: | ||
== Event Shop == |
== Event Shop == |
||
| − | <tabber>Rumor of Miss Ripper= |
+ | <tabber>The Rumor of Miss Ripper= |
| + | ===Part 1=== |
||
| + | Available from the start of the event. |
||
{| class="wikitable" style="width:100%; text-align:center" |
{| class="wikitable" style="width:100%; text-align:center" |
||
! style="width:16.7%" |Item |
! style="width:16.7%" |Item |
||
| Line 94: | Line 87: | ||
|[[File:Memoria 1421 s.png|50px|link=The Day We Became Friends]] |
|[[File:Memoria 1421 s.png|50px|link=The Day We Became Friends]] |
||
|5 |
|5 |
||
| − | |50 x [[File:Rumor of Miss Ripper.png|40px]] |
+ | |50 x [[File:The Rumor of Miss Ripper.png|40px]] |
|[[Backgrounds|Home Screen Background]] |
|[[Backgrounds|Home Screen Background]] |
||
|1 |
|1 |
||
| − | |80 x [[File:Rumor of Miss Ripper.png|40px]] |
+ | |80 x [[File:The Rumor of Miss Ripper.png|40px]] |
|- |
|- |
||
|{{ItemPic|Gacha Ticket|50}} |
|{{ItemPic|Gacha Ticket|50}} |
||
|3 |
|3 |
||
| − | |80 x [[File:Rumor of Miss Ripper.png|40px]] |
+ | |80 x [[File:The Rumor of Miss Ripper.png|40px]] |
|{{ItemPic|AP Potion|50}} |
|{{ItemPic|AP Potion|50}} |
||
|5 |
|5 |
||
| − | |40 x [[File:Rumor of Miss Ripper.png|40px]] |
+ | |40 x [[File:The Rumor of Miss Ripper.png|40px]] |
|- |
|- |
||
|{{ItemPic|BP Potion|50}} |
|{{ItemPic|BP Potion|50}} |
||
|5 |
|5 |
||
| − | |40 x [[File:Rumor of Miss Ripper.png|40px]] |
+ | |40 x [[File:The Rumor of Miss Ripper.png|40px]] |
|{{Inum|CC|100000|50px}} |
|{{Inum|CC|100000|50px}} |
||
|20 |
|20 |
||
| − | |40 x [[File:Rumor of Miss Ripper.png|40px]] |
+ | |40 x [[File:The Rumor of Miss Ripper.png|40px]] |
|- |
|- |
||
|{{ItemPic|Magia Chip|50}} |
|{{ItemPic|Magia Chip|50}} |
||
|25 |
|25 |
||
| − | |10 x [[File:Rumor of Miss Ripper.png|40px]] |
+ | |10 x [[File:The Rumor of Miss Ripper.png|40px]] |
|{{ItemPic|Master Gem +|50}} |
|{{ItemPic|Master Gem +|50}} |
||
|100 |
|100 |
||
| − | |3 x [[File:Rumor of Miss Ripper.png|40px]] |
+ | |3 x [[File:The Rumor of Miss Ripper.png|40px]] |
|- |
|- |
||
|{{ItemPic|Master Gem ++|50}} |
|{{ItemPic|Master Gem ++|50}} |
||
|50 |
|50 |
||
| − | |10 x [[File:Rumor of Miss Ripper.png|40px]] |
+ | |10 x [[File:The Rumor of Miss Ripper.png|40px]] |
|{{ItemPic|Fragment of Disgust|50}} |
|{{ItemPic|Fragment of Disgust|50}} |
||
|30 |
|30 |
||
| − | |20 x [[File:Rumor of Miss Ripper.png|40px]] |
+ | |20 x [[File:The Rumor of Miss Ripper.png|40px]] |
|- |
|- |
||
|{{ItemPic|Fragment of Disgust +|50}} |
|{{ItemPic|Fragment of Disgust +|50}} |
||
|3 |
|3 |
||
| − | |80 x [[File:Rumor of Miss Ripper.png|40px]] |
+ | |80 x [[File:The Rumor of Miss Ripper.png|40px]] |
|{{ItemPic|Fragment of Grief|50}} |
|{{ItemPic|Fragment of Grief|50}} |
||
|30 |
|30 |
||
| − | |20 x [[File:Rumor of Miss Ripper.png|40px]] |
+ | |20 x [[File:The Rumor of Miss Ripper.png|40px]] |
|- |
|- |
||
|{{ItemPic|Fragment of Grief +|50}} |
|{{ItemPic|Fragment of Grief +|50}} |
||
|3 |
|3 |
||
| − | |80 x [[File:Rumor of Miss Ripper.png|40px]] |
+ | |80 x [[File:The Rumor of Miss Ripper.png|40px]] |
|{{ItemPic|Fragment of Rage|50}} |
|{{ItemPic|Fragment of Rage|50}} |
||
|30 |
|30 |
||
| − | |20 x [[File:Rumor of Miss Ripper.png|40px]] |
+ | |20 x [[File:The Rumor of Miss Ripper.png|40px]] |
|- |
|- |
||
|{{ItemPic|Fragment of Rage +|50}} |
|{{ItemPic|Fragment of Rage +|50}} |
||
|3 |
|3 |
||
| − | |80 x [[File:Rumor of Miss Ripper.png|40px]] |
+ | |80 x [[File:The Rumor of Miss Ripper.png|40px]] |
|{{ItemPic|Fragment of Fear|50}} |
|{{ItemPic|Fragment of Fear|50}} |
||
|30 |
|30 |
||
| − | |20 x [[File:Rumor of Miss Ripper.png|40px]] |
+ | |20 x [[File:The Rumor of Miss Ripper.png|40px]] |
|- |
|- |
||
|{{ItemPic|Fragment of Fear +|50}} |
|{{ItemPic|Fragment of Fear +|50}} |
||
|3 |
|3 |
||
| − | |80 x [[File:Rumor of Miss Ripper.png|40px]] |
+ | |80 x [[File:The Rumor of Miss Ripper.png|40px]] |
|{{ItemPic|Forest Orb|50}} |
|{{ItemPic|Forest Orb|50}} |
||
|20 |
|20 |
||
| − | |10 x [[File:Rumor of Miss Ripper.png|40px]] |
+ | |10 x [[File:The Rumor of Miss Ripper.png|40px]] |
|- |
|- |
||
|{{ItemPic|Forest Orb +|50}} |
|{{ItemPic|Forest Orb +|50}} |
||
|15 |
|15 |
||
| − | |20 x [[File:Rumor of Miss Ripper.png|40px]] |
+ | |20 x [[File:The Rumor of Miss Ripper.png|40px]] |
|{{ItemPic|Forest Orb ++|50}} |
|{{ItemPic|Forest Orb ++|50}} |
||
|10 |
|10 |
||
| − | |30 x [[File:Rumor of Miss Ripper.png|40px]] |
+ | |30 x [[File:The Rumor of Miss Ripper.png|40px]] |
|- |
|- |
||
|{{ItemPic|Light Orb|50}} |
|{{ItemPic|Light Orb|50}} |
||
|20 |
|20 |
||
| − | |10 x [[File:Rumor of Miss Ripper.png|40px]] |
+ | |10 x [[File:The Rumor of Miss Ripper.png|40px]] |
|{{ItemPic|Light Orb +|50}} |
|{{ItemPic|Light Orb +|50}} |
||
|15 |
|15 |
||
| − | |20 x [[File:Rumor of Miss Ripper.png|40px]] |
+ | |20 x [[File:The Rumor of Miss Ripper.png|40px]] |
|- |
|- |
||
|{{ItemPic|Light Orb ++|50}} |
|{{ItemPic|Light Orb ++|50}} |
||
|10 |
|10 |
||
| − | |30 x [[File:Rumor of Miss Ripper.png|40px]] |
+ | |30 x [[File:The Rumor of Miss Ripper.png|40px]] |
|{{ItemPic|Rainbow Orb|50}} |
|{{ItemPic|Rainbow Orb|50}} |
||
|3 |
|3 |
||
| − | |100 x [[File:Rumor of Miss Ripper.png|40px]] |
+ | |100 x [[File:The Rumor of Miss Ripper.png|40px]] |
|- |
|- |
||
|{{ItemPic|Standing Ear Wrapper|50}} |
|{{ItemPic|Standing Ear Wrapper|50}} |
||
|16 |
|16 |
||
| − | |15 x [[File:Rumor of Miss Ripper.png|40px]] |
+ | |15 x [[File:The Rumor of Miss Ripper.png|40px]] |
|{{ItemPic|Blowing Horn|50}} |
|{{ItemPic|Blowing Horn|50}} |
||
|16 |
|16 |
||
| − | |15 x [[File:Rumor of Miss Ripper.png|40px]] |
+ | |15 x [[File:The Rumor of Miss Ripper.png|40px]] |
|- |
|- |
||
|{{ItemPic|Ikigami's Hairball|50}} |
|{{ItemPic|Ikigami's Hairball|50}} |
||
|16 |
|16 |
||
| − | |15 x [[File:Rumor of Miss Ripper.png|40px]] |
+ | |15 x [[File:The Rumor of Miss Ripper.png|40px]] |
|{{ItemPic|Mail Glider|50}} |
|{{ItemPic|Mail Glider|50}} |
||
|12 |
|12 |
||
| − | |30 x [[File:Rumor of Miss Ripper.png|40px]] |
+ | |30 x [[File:The Rumor of Miss Ripper.png|40px]] |
|- |
|- |
||
|{{ItemPic|Staff Keyswitch|50}} |
|{{ItemPic|Staff Keyswitch|50}} |
||
|12 |
|12 |
||
| − | |30 x [[File:Rumor of Miss Ripper.png|40px]] |
+ | |30 x [[File:The Rumor of Miss Ripper.png|40px]] |
|{{ItemPic|Mascot's Mane|50}} |
|{{ItemPic|Mascot's Mane|50}} |
||
|12 |
|12 |
||
| − | |30 x [[File:Rumor of Miss Ripper.png|40px]] |
+ | |30 x [[File:The Rumor of Miss Ripper.png|40px]] |
|- |
|- |
||
|{{ItemPic|Rhyton Ribbon|50}} |
|{{ItemPic|Rhyton Ribbon|50}} |
||
|8 |
|8 |
||
| − | |60 x [[File:Rumor of Miss Ripper.png|40px]] |
+ | |60 x [[File:The Rumor of Miss Ripper.png|40px]] |
|{{ItemPic|Big Ferris Turbine|50}} |
|{{ItemPic|Big Ferris Turbine|50}} |
||
|8 |
|8 |
||
| − | |60 x [[File:Rumor of Miss Ripper.png|40px]] |
+ | |60 x [[File:The Rumor of Miss Ripper.png|40px]] |
|- |
|- |
||
|{{ItemPic|Sheep's Horn|50}} |
|{{ItemPic|Sheep's Horn|50}} |
||
|8 |
|8 |
||
| − | |60 x [[File:Rumor of Miss Ripper.png|40px]] |
+ | |60 x [[File:The Rumor of Miss Ripper.png|40px]] |
|{{ItemPic|Forest Book|50}} |
|{{ItemPic|Forest Book|50}} |
||
|15 |
|15 |
||
| − | |15 x [[File:Rumor of Miss Ripper.png|40px]] |
+ | |15 x [[File:The Rumor of Miss Ripper.png|40px]] |
|- |
|- |
||
|{{ItemPic|Forest Book +|50}} |
|{{ItemPic|Forest Book +|50}} |
||
|10 |
|10 |
||
| − | |30 x [[File:Rumor of Miss Ripper.png|40px]] |
+ | |30 x [[File:The Rumor of Miss Ripper.png|40px]] |
|{{ItemPic|Forest Book ++|50}} |
|{{ItemPic|Forest Book ++|50}} |
||
|5 |
|5 |
||
| − | |60 x [[File:Rumor of Miss Ripper.png|40px]] |
+ | |60 x [[File:The Rumor of Miss Ripper.png|40px]] |
|- |
|- |
||
|{{ItemPic|Light Book|50}} |
|{{ItemPic|Light Book|50}} |
||
|15 |
|15 |
||
| − | |15 x [[File:Rumor of Miss Ripper.png|40px]] |
+ | |15 x [[File:The Rumor of Miss Ripper.png|40px]] |
|{{ItemPic|Light Book +|50}} |
|{{ItemPic|Light Book +|50}} |
||
|10 |
|10 |
||
| − | |30 x [[File:Rumor of Miss Ripper.png|40px]] |
+ | |30 x [[File:The Rumor of Miss Ripper.png|40px]] |
|- |
|- |
||
|{{ItemPic|Light Book ++|50}} |
|{{ItemPic|Light Book ++|50}} |
||
|5 |
|5 |
||
| − | |60 x [[File:Rumor of Miss Ripper.png|40px]] |
+ | |60 x [[File:The Rumor of Miss Ripper.png|40px]] |
|{{Inum|CC|1000|50px}} |
|{{Inum|CC|1000|50px}} |
||
| - |
| - |
||
| − | |3 x [[File:Rumor of Miss Ripper.png|40px]] |
+ | |3 x [[File:The Rumor of Miss Ripper.png|40px]] |
| ⚫ | |||
| + | |||
| + | ===Part 2=== |
||
| + | Available during the 2nd half of the event. |
||
| ⚫ | |||
| + | ! style="width:16.7%" |Item |
||
| + | ! style="width:16.6%" |Quantity |
||
| + | ! style="width:16.7%" |Price |
||
| + | ! style="width:16.7%" |Item |
||
| + | ! style="width:16.6%" |Quantity |
||
| + | ! style="width:16.7%" |Price |
||
| ⚫ | |||
| + | |{{ItemPic|Gacha Ticket|50}} |
||
| + | |3 |
||
| + | |80 x [[File:The Rumor of Miss Ripper.png|40px]] |
||
| + | |{{ItemPic|AP Potion|50}} |
||
| + | |5 |
||
| + | |40 x [[File:The Rumor of Miss Ripper.png|40px]] |
||
| + | |- |
||
| + | |{{ItemPic|Rainbow Orb|50}} |
||
| + | |3 |
||
| + | |100 x [[File:The Rumor of Miss Ripper.png|40px]] |
||
| + | |{{ItemPic|Fragment of Wonder|50}} |
||
| + | |30 |
||
| + | |20 x [[File:The Rumor of Miss Ripper.png|40px]] |
||
| + | |- |
||
| + | |{{ItemPic|Fragment of Wonder +|50}} |
||
| + | |3 |
||
| + | |80 x [[File:The Rumor of Miss Ripper.png|40px]] |
||
| + | |{{ItemPic|Fragment of Expectation|50}} |
||
| + | |30 |
||
| + | |20 x [[File:The Rumor of Miss Ripper.png|40px]] |
||
| + | |- |
||
| + | |{{ItemPic|Fragment of Expectation +|50}} |
||
| + | |3 |
||
| + | |80 x [[File:The Rumor of Miss Ripper.png|40px]] |
||
| + | |{{ItemPic|Fragment of Ecstasy|50}} |
||
| + | |30 |
||
| + | |20 x [[File:The Rumor of Miss Ripper.png|40px]] |
||
| + | |- |
||
| + | |{{ItemPic|Fragment of Ecstasy +|50}} |
||
| + | |3 |
||
| + | |80 x [[File:The Rumor of Miss Ripper.png|40px]] |
||
| + | |{{ItemPic|Fragment of Respect|50}} |
||
| + | |30 |
||
| + | |20 x [[File:The Rumor of Miss Ripper.png|40px]] |
||
| + | |- |
||
| + | |{{ItemPic|Fragment of Respect +|50}} |
||
| + | |3 |
||
| + | |80 x [[File:The Rumor of Miss Ripper.png|40px]] |
||
| + | |{{ItemPic|Flame Orb|50}} |
||
| + | |20 |
||
| + | |10 x [[File:The Rumor of Miss Ripper.png|40px]] |
||
| + | |- |
||
| + | |{{ItemPic|Flame Orb +|50}} |
||
| + | |15 |
||
| + | |20 x [[File:The Rumor of Miss Ripper.png|40px]] |
||
| + | |{{ItemPic|Flame Orb ++|50}} |
||
| + | |10 |
||
| + | |30 x [[File:The Rumor of Miss Ripper.png|40px]] |
||
| + | |- |
||
| + | |{{ItemPic|Aqua Orb|50}} |
||
| + | |20 |
||
| + | |10 x [[File:The Rumor of Miss Ripper.png|40px]] |
||
| + | |{{ItemPic|Aqua Orb +|50}} |
||
| + | |15 |
||
| + | |20 x [[File:The Rumor of Miss Ripper.png|40px]] |
||
| + | |- |
||
| + | |{{ItemPic|Aqua Orb ++|50}} |
||
| + | |10 |
||
| + | |30 x [[File:The Rumor of Miss Ripper.png|40px]] |
||
| + | |{{ItemPic|Dark Orb|50}} |
||
| + | |20 |
||
| + | |10 x [[File:The Rumor of Miss Ripper.png|40px]] |
||
| + | |- |
||
| + | |{{ItemPic|Dark Orb +|50}} |
||
| + | |15 |
||
| + | |20 x [[File:The Rumor of Miss Ripper.png|40px]] |
||
| + | |{{ItemPic|Dark Orb ++|50}} |
||
| + | |10 |
||
| + | |30 x [[File:The Rumor of Miss Ripper.png|40px]] |
||
| + | |||
| + | |- |
||
| + | |{{ItemPic|Mirror Invitation Letter|50}} |
||
| + | |16 |
||
| + | |15 x [[File:The Rumor of Miss Ripper.png|40px]] |
||
| + | |{{ItemPic|Nanny's Pedestal|50}} |
||
| + | |16 |
||
| + | |15 x [[File:The Rumor of Miss Ripper.png|40px]] |
||
| + | |- |
||
| + | |{{ItemPic|Nomadistic Stake|50}} |
||
| + | |16 |
||
| + | |15 x [[File:The Rumor of Miss Ripper.png|40px]] |
||
| + | |{{ItemPic|Chain of Padlock|50}} |
||
| + | |12 |
||
| + | |30 x [[File:The Rumor of Miss Ripper.png|40px]] |
||
| + | |- |
||
| + | |{{ItemPic|Owl Bucket|50}} |
||
| + | |12 |
||
| + | |30 x [[File:The Rumor of Miss Ripper.png|40px]] |
||
| + | |{{ItemPic|Bear's Ruff|50}} |
||
| + | |12 |
||
| + | |30 x [[File:The Rumor of Miss Ripper.png|40px]] |
||
| + | |- |
||
| + | |{{ItemPic|AI Code|50}} |
||
| + | |8 |
||
| + | |60 x [[File:The Rumor of Miss Ripper.png|40px]] |
||
| + | |{{ItemPic|Curator's Hood|50}} |
||
| + | |8 |
||
| + | |60 x [[File:The Rumor of Miss Ripper.png|40px]] |
||
| + | |- |
||
| + | |{{ItemPic|Rooftop Balloons|50}} |
||
| + | |8 |
||
| + | |60 x [[File:The Rumor of Miss Ripper.png|40px]] |
||
| + | |{{ItemPic|Flame Book|50}} |
||
| + | |15 |
||
| + | |15 x [[File:The Rumor of Miss Ripper.png|40px]] |
||
| + | |- |
||
| + | |{{ItemPic|Flame Book +|50}} |
||
| + | |10 |
||
| + | |30 x [[File:The Rumor of Miss Ripper.png|40px]] |
||
| + | |{{ItemPic|Flame Book ++|50}} |
||
| + | |5 |
||
| + | |60 x [[File:The Rumor of Miss Ripper.png|40px]] |
||
| + | |- |
||
| + | |{{ItemPic|Aqua Book|50}} |
||
| + | |15 |
||
| + | |15 x [[File:The Rumor of Miss Ripper.png|40px]] |
||
| + | |{{ItemPic|Aqua Book +|50}} |
||
| + | |10 |
||
| + | |30 x [[File:The Rumor of Miss Ripper.png|40px]] |
||
| + | |- |
||
| + | |{{ItemPic|Aqua Book ++|50}} |
||
| + | |5 |
||
| + | |60 x [[File:The Rumor of Miss Ripper.png|40px]] |
||
| + | |{{ItemPic|Dark Book|50}} |
||
| + | |15 |
||
| + | |15 x [[File:The Rumor of Miss Ripper.png|40px]] |
||
| + | |- |
||
| + | |{{ItemPic|Dark Book +|50}} |
||
| + | |10 |
||
| + | |30 x [[File:The Rumor of Miss Ripper.png|40px]] |
||
| + | |{{ItemPic|Dark Book ++|50}} |
||
| + | |5 |
||
| + | |60 x [[File:The Rumor of Miss Ripper.png|40px]] |
||
|} |
|} |
||
|-|Suzune Magica Area Flag= |
|-|Suzune Magica Area Flag= |
||
| + | Completely filling all story node gauges will provide enough Area Flags to clear this shop. |
||
| + | |||
{| class="wikitable" style="width:100%; text-align:center" |
{| class="wikitable" style="width:100%; text-align:center" |
||
! style="width:16.7%" |Item |
! style="width:16.7%" |Item |
||
| Line 242: | Line 382: | ||
|- |
|- |
||
|[[File:Memoria 1297 s.png|50px|link=Over Limiter]] |
|[[File:Memoria 1297 s.png|50px|link=Over Limiter]] |
||
| − | | |
+ | |2 |
| − | | |
+ | |2 x [[File:Suzune Magica Area Flag.png|40px]] |
|{{ItemPic|Fragment of Disgust +|50}} |
|{{ItemPic|Fragment of Disgust +|50}} |
||
|3 |
|3 |
||
| Line 304: | Line 444: | ||
|1 x [[File:Suzune Magica Area Flag.png|40px]] |
|1 x [[File:Suzune Magica Area Flag.png|40px]] |
||
|} |
|} |
||
| − | |-| |
+ | |-|The Item Miss Ripper Searching For= |
| + | Defeating all story bosses, excluding the final boss, will provide enough The Item Miss Ripper Searching For to clear this shop. |
||
{| class="wikitable" style="width:100%; text-align:center" |
{| class="wikitable" style="width:100%; text-align:center" |
||
! style="width:16.7%" |Item |
! style="width:16.7%" |Item |
||
| Line 315: | Line 456: | ||
|[[File:Memoria 1420 s.png|50px|link=Once Again, Taking Your Hand]] |
|[[File:Memoria 1420 s.png|50px|link=Once Again, Taking Your Hand]] |
||
|1 |
|1 |
||
| − | |8 x [[File: |
+ | |8 x [[File:The Item Miss Ripper Searching For.png|40px]] |
| |
| |
||
| |
| |
||
| |
| |
||
|} |
|} |
||
| + | </tabber> |
||
==See Also== |
==See Also== |
||
| + | *[[Cross Connection]] |
||
*[[Rumors in Disguise Pickup Gacha]] |
*[[Rumors in Disguise Pickup Gacha]] |
||
| − | __NOTOC__ |
||
[[Category:Event]] |
[[Category:Event]] |
||
[[Category:Boss Event]] |
[[Category:Boss Event]] |
||
Revision as of 01:32, 6 January 2020
| Table of contents | ||||
|---|---|---|---|---|
| Event Guide | Quests | Missions | Event Shop | |
Event Duration
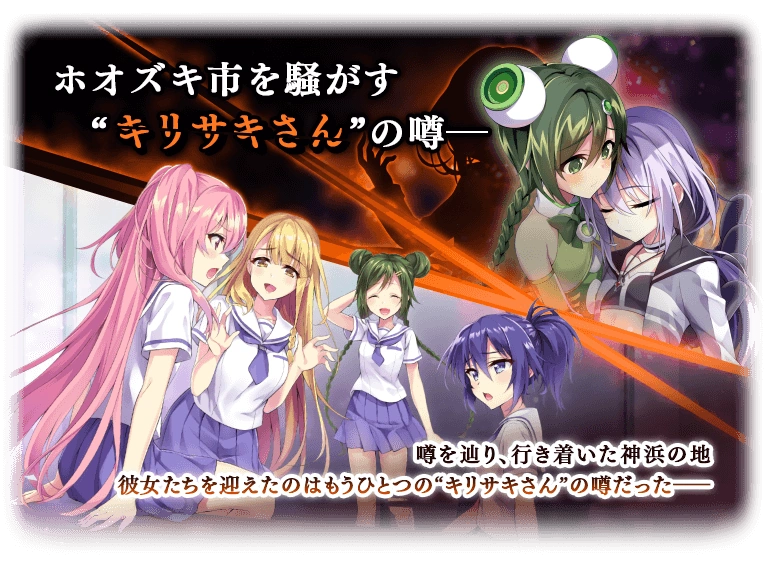
JP (Rumors in Disguise ~魔法少女すずね☆マギカ~)
- 31st October 2019 16:00 JST - 11th November 2019 14:59 JST
Event Guide
Announcement
How to Play
1. In Boss Events, stories are arranged on a map-like stage. Players travel from one node to the other to reach the final boss.
2. Each story node has a target meter and up to 3 battles to choose from (beginner, intermediate, and hard). To clear the node, complete the story battles until the meter fills up. You do not have to complete every battle to unlock the next node; you only need to fill up the node meter.
3. Boss quests are unlocked at the end of each story area. Boss node meters represent the boss's HP and must be brought to 0 to clear the node. Boss HP does not refill between battles, so bosses can be defeated over more than 1 battle. Defeating bosses gives special currencies and unlocks other areas.
4. All battles have a turn limit. Exceeding the limit ends the battle as a victory for the player.
Event Currencies
| Currency | How to obtain | |
|---|---|---|
| キリサキさんの噂話 | All event battles drop Rumors of Miss Ripper which can be exchanged at the shop. | |
| すずねマギカエリアフラッグ | Clearing a node by filling its meter grants Suzune Magica Area Flags which can be used to acquire Over Limiters and Spirit Enhancement Items. | |
| キリサキさんの探し物 | Defeating bosses gives players The Item Miss Ripper Searching For, required for the special Memoria Once Again, Taking Your Hand. | |
Event Memoria Guide
| Memoria | Bonus Effect | Max Limit Break Bonus Effect |
|---|---|---|

|
Increase |
Increase |

|
Increase |
Increase |

|
Increase |
Increase |

|
Attack Up [3000%] & Defense Up [3000%] during the final boss battle | |
Quests
Missions
There are no separate Missions for this event.
Event Shop
Part 1
Available from the start of the event.
| Item | Quantity | Price | Item | Quantity | Price |
|---|---|---|---|---|---|

|
5 | 50 x |
Home Screen Background | 1 | 80 x |
 Gacha Ticket Gacha Ticket
|
3 | 80 x |
 AP Potion AP Potion
|
5 | 40 x |
 BP Potion BP Potion
|
5 | 40 x |
100000
 |
20 | 40 x |
 Magia Chip Magia Chip
|
25 | 10 x |
 Master Gem + Master Gem +
|
100 | 3 x |
 Master Gem ++ Master Gem ++
|
50 | 10 x |
 Fragment of Disgust Fragment of Disgust
|
30 | 20 x |
 Fragment of Disgust + Fragment of Disgust +
|
3 | 80 x |
 Fragment of Grief Fragment of Grief
|
30 | 20 x |
 Fragment of Grief + Fragment of Grief +
|
3 | 80 x |
 Fragment of Rage Fragment of Rage
|
30 | 20 x |
 Fragment of Rage + Fragment of Rage +
|
3 | 80 x |
 Fragment of Fear Fragment of Fear
|
30 | 20 x |
 Fragment of Fear + Fragment of Fear +
|
3 | 80 x |
 Forest Orb Forest Orb
|
20 | 10 x |
 Forest Orb + Forest Orb +
|
15 | 20 x |
 Forest Orb ++ Forest Orb ++
|
10 | 30 x |
 Light Orb Light Orb
|
20 | 10 x |
 Light Orb + Light Orb +
|
15 | 20 x |
 Light Orb ++ Light Orb ++
|
10 | 30 x |
 Rainbow Orb Rainbow Orb
|
3 | 100 x |
 Standing Ear Wrapper Standing Ear Wrapper
|
16 | 15 x |
 Blowing Horn Blowing Horn
|
16 | 15 x |
 Ikigami's Hairball Ikigami's Hairball
|
16 | 15 x |
 Mail Glider Mail Glider
|
12 | 30 x |
 Staff Keyswitch Staff Keyswitch
|
12 | 30 x |
 Mascot's Mane Mascot's Mane
|
12 | 30 x |
 Rhyton Ribbon Rhyton Ribbon
|
8 | 60 x |
 Big Ferris Turbine Big Ferris Turbine
|
8 | 60 x |
 Sheep's Horn Sheep's Horn
|
8 | 60 x |
 Forest Book Forest Book
|
15 | 15 x |
 Forest Book + Forest Book +
|
10 | 30 x |
 Forest Book ++ Forest Book ++
|
5 | 60 x |
 Light Book Light Book
|
15 | 15 x |
 Light Book + Light Book +
|
10 | 30 x |
 Light Book ++ Light Book ++
|
5 | 60 x |
1000
|
- | 3 x |
Part 2
Available during the 2nd half of the event.
| Item | Quantity | Price | Item | Quantity | Price |
|---|---|---|---|---|---|
| Gacha Ticket
|
3 | 80 x |
AP Potion
|
5 | 40 x |
| Rainbow Orb
|
3 | 100 x |
 Fragment of Wonder Fragment of Wonder
|
30 | 20 x |
 Fragment of Wonder + Fragment of Wonder +
|
3 | 80 x |
 Fragment of Expectation Fragment of Expectation
|
30 | 20 x |
 Fragment of Expectation + Fragment of Expectation +
|
3 | 80 x |
 Fragment of Ecstasy Fragment of Ecstasy
|
30 | 20 x |
 Fragment of Ecstasy + Fragment of Ecstasy +
|
3 | 80 x |
 Fragment of Respect Fragment of Respect
|
30 | 20 x |
 Fragment of Respect + Fragment of Respect +
|
3 | 80 x |
 Flame Orb Flame Orb
|
20 | 10 x |
 Flame Orb + Flame Orb +
|
15 | 20 x |
 Flame Orb ++ Flame Orb ++
|
10 | 30 x |
 Aqua Orb Aqua Orb
|
20 | 10 x |
 Aqua Orb + Aqua Orb +
|
15 | 20 x |
 Aqua Orb ++ Aqua Orb ++
|
10 | 30 x |
 Dark Orb Dark Orb
|
20 | 10 x |
 Dark Orb + Dark Orb +
|
15 | 20 x |
 Dark Orb ++ Dark Orb ++
|
10 | 30 x |
 Mirror Invitation Letter Mirror Invitation Letter
|
16 | 15 x |
 Nanny's Pedestal Nanny's Pedestal
|
16 | 15 x |
 Nomadistic Stake Nomadistic Stake
|
16 | 15 x |
 Chain of Padlock Chain of Padlock
|
12 | 30 x |
 Owl Bucket Owl Bucket
|
12 | 30 x |
 Bear's Ruff Bear's Ruff
|
12 | 30 x |
 AI Code AI Code
|
8 | 60 x |
 Curator's Hood Curator's Hood
|
8 | 60 x |
 Rooftop Balloons Rooftop Balloons
|
8 | 60 x |
 Flame Book Flame Book
|
15 | 15 x |
 Flame Book + Flame Book +
|
10 | 30 x |
 Flame Book ++ Flame Book ++
|
5 | 60 x |
 Aqua Book Aqua Book
|
15 | 15 x |
 Aqua Book + Aqua Book +
|
10 | 30 x |
 Aqua Book ++ Aqua Book ++
|
5 | 60 x |
 Dark Book Dark Book
|
15 | 15 x |
 Dark Book + Dark Book +
|
10 | 30 x |
 Dark Book ++ Dark Book ++
|
5 | 60 x |
Completely filling all story node gauges will provide enough Area Flags to clear this shop.
| Item | Quantity | Price | Item | Quantity | Price |
|---|---|---|---|---|---|

|
2 | 2 x |
Fragment of Disgust +
|
3 | 1 x |
 Fragment of Disgust ++ Fragment of Disgust ++
|
1 | 2 x |
Fragment of Grief +
|
3 | 1 x |
 Fragment of Grief ++ Fragment of Grief ++
|
1 | 2 x |
Fragment of Rage +
|
3 | 1 x |
 Fragment of Rage ++ Fragment of Rage ++
|
1 | 2 x |
Fragment of Fear +
|
3 | 1 x |
 Fragment of Fear ++ Fragment of Fear ++
|
1 | 2 x |
Fragment of Wonder +
|
3 | 1 x |
 Fragment of Wonder ++ Fragment of Wonder ++
|
1 | 2 x |
Fragment of Expectation +
|
3 | 1 x |
 Fragment of Expectation ++ Fragment of Expectation ++
|
1 | 2 x |
Fragment of Ecstasy +
|
3 | 1 x |
 Fragment of Ecstasy ++ Fragment of Ecstasy ++
|
1 | 2 x |
Fragment of Respect +
|
3 | 1 x |
 Fragment of Respect ++ Fragment of Respect ++
|
1 | 2 x |
Rainbow Orb
|
3 | 1 x |
Defeating all story bosses, excluding the final boss, will provide enough The Item Miss Ripper Searching For to clear this shop.
| Item | Quantity | Price | Item | Quantity | Price |
|---|---|---|---|---|---|

|
1 | 8 x |